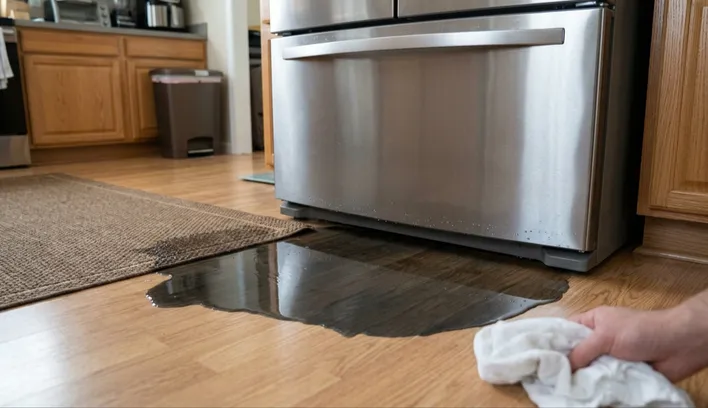
Finding a puddle under your refrigerator is one of those moments that stops you in your tracks. Before you panic or assume the worst, know this: water pooling under a refrigerator is one of the most common appliance complaints homeowners report, and in most cases, the fix is straightforward once you identify the source.
This guide walks you through the seven most likely culprits behind a refrigerator leaking water onto your floor, what each one looks like in practice, and exactly what you can do about it. Whether you own a Samsung, LG, Whirlpool, GE, or any other brand, these causes and fixes apply across the board.
Before You Do Anything, Unplug the Refrigerator
Safety comes first. Water pooling near electrical components presents a significant shock hazard and can cause short circuits in control boards or lighting systems. Pull the plug from the wall before you start inspecting, and use old towels or a wet vacuum to soak up any standing water right away.
1. A Clogged Defrost Drain Is the Most Common Cause
If you had to bet on a single cause, this is the one. A clogged defrost drain is a likely cause of water pooling because it prevents water from properly draining during the defrost cycle. Food particles, debris, and mold buildup can block the drain over time.
Here is how the system works: your refrigerator runs an automatic defrost cycle to melt frost off the evaporator coils. The defrost heater heats up, the frost on the evaporator coils liquefies, and the water drips off the coils into a trough below. The water then drains through a hole in the trough, traveling down a hose to a drain pan located at the base of the refrigerator. When that drain hose gets blocked, water has nowhere to go except onto your floor.
How to fix it: You can flush out the drain hole with a solution made of 1 tablespoon of baking soda and 2 cups of hot tap water. Use a bulb baster to squeeze the solution into the drain hole and flush out the drain tube. When clear, you will hear water running down into the drain pan below. To prevent this from recurring, flush the drain opening with that same solution once or twice a year.
If there is ice blocking the drain rather than debris, use a hairdryer to melt the ice, keeping it on a low setting to avoid damaging refrigerator components.
2. A Cracked or Overflowing Drain Pan
Many people do not even realize their refrigerator has a drain pan. Your fridge comes equipped with a condensation tray or drip pan located underneath it, designed to collect excess water. Under normal circumstances, the heat from the compressor causes that water to evaporate before it overflows. But when the drain system is sending too much water to the pan, or when the pan itself is cracked, water ends up on your kitchen floor.
How to fix it: Remove the cover panel at the bottom of the refrigerator to access the drain pan. Check the pan for cracks, tears, or improper placement. If it is positioned incorrectly, adjust it. If it is damaged, replace it. Drain pans are inexpensive parts available at most appliance parts retailers and are easy to swap out without professional help.
3. A Faulty or Leaking Water Supply Line
Refrigerators with built-in ice makers and water dispensers are connected to your home’s water supply through a dedicated supply line. If this line becomes damaged or develops a leak, water may drip or pool beneath the fridge.
This is particularly worth checking if the water seems to be coming from the back of the appliance rather than the front. Water under the refrigerator and water coming from the back could indicate a loose connection or other issue with the main water supply line. Low or no water pressure to the ice maker or water dispenser could be a clue, as is water pooling on the floor and flowing toward the back of the unit.
How to fix it: Unplug the refrigerator and pull it away from the wall. Inspect the water line for kinks, cracks, or loose fittings at both ends. A damaged line should be replaced entirely rather than patched. If the inlet valve appears loose or is malfunctioning, that component may also need replacement. This is a good time to call a professional if you are not comfortable working behind the appliance.
4. Worn or Damaged Door Gaskets
The rubber gaskets running along the edges of your refrigerator and freezer doors do more than just keep the cold air in. Damaged or worn refrigerator door gaskets can allow warm air to enter, increasing condensation inside the appliance and causing water to pool.
When warm, humid air repeatedly enters the refrigerator compartment, it condenses on cold surfaces and eventually drips onto the floor. You might notice this issue worsens during the summer months when indoor humidity is higher.
How to fix it: Run your fingers along the entire length of the gasket and look for cracks, tears, or areas where it no longer sits flush against the door frame. A simple test: close the door on a piece of paper. If you can pull the paper out without resistance, the seal is compromised. Replacement gaskets are model-specific and can be ordered directly from the manufacturer or a parts supplier. They typically snap or screw into place and do not require special tools.
5. An Ice Maker That Is Leaking or Misaligned
If your refrigerator has an automatic ice maker, it could be the source of the leak even when everything else looks fine. A water spigot fills the ice tray in your ice maker. If the spigot is not aligned with the cup, water may pool on the bottom of the ice maker and leak out before it has a chance to freeze.
An out-of-level refrigerator can also throw off the ice maker. An out-of-balance refrigerator or ice bin could cause water from melted ice to pool in the bin rather than flow to the drain designed to clear it.
How to fix it: Start by checking that your refrigerator is level using a spirit level or smartphone app. The refrigerator should have a slight lean toward the back, roughly 3 degrees, which ensures doors close properly and that drainage flows toward the rear. Adjust the leveling feet accordingly. If the ice maker spigot and fill cup are visibly misaligned, consult your owner’s manual for your specific model to realign them or contact a technician for a service call.
6. Incorrect Temperature Settings
This one often gets overlooked, but the temperature your refrigerator is set to can directly influence how much water ends up on your floor. Setting the freezer section too warm, typically above 10 degrees Fahrenheit, can prevent the evaporator coils from fully freezing moisture, leading to a buildup that constantly thaws and overflows the drip pan. Conversely, setting the refrigerator section below 35 degrees Fahrenheit can cause items near the back wall to freeze solid, and when the defrost cycle runs, that localized ice melts and contributes to pooling water.
How to fix it: Set your refrigerator between 35 and 38 degrees Fahrenheit and your freezer at 0 degrees Fahrenheit. Give the appliance 24 hours to stabilize after any adjustment. If your unit has a digital display, the recommended settings are usually outlined in the owner’s manual.
7. High Indoor Humidity and Poor Ventilation
Your kitchen environment plays a bigger role in refrigerator performance than most people expect. If the air in your kitchen is too moist, the moisture will condense on the refrigerator’s cold surfaces, leading to water accumulation. To combat this problem, consider using a dehumidifier in your kitchen or improving ventilation by opening windows or using exhaust fans while cooking.
On top of that, good ventilation around your fridge helps maintain its efficiency and prevents overheating, which can sometimes lead to internal condensation. Ensure there is adequate space around your fridge for air to circulate freely, and keep the ventilation grilles on the back of the fridge clear of dust and debris.
How to fix it: Pull the refrigerator out from the wall and vacuum any dust buildup from the rear coils and ventilation area. Make sure there is at least an inch of clearance on either side and a few inches at the back. If your kitchen regularly feels humid, a portable dehumidifier can make a noticeable difference.
Quick Reference: Causes and Fixes at a Glance
| Cause | Primary Sign | DIY or Pro? |
| Clogged defrost drain | Water under produce drawer, ice in freezer floor | DIY |
| Cracked drain pan | Puddle directly under the front or rear of fridge | DIY |
| Leaking water supply line | Water at the back of unit, low dispenser pressure | DIY or Pro |
| Worn door gaskets | Visible condensation, doors not sealing tight | DIY |
| Ice maker misalignment | Puddle inside ice bin, icy floor under unit | DIY or Pro |
| Wrong temperature settings | Frost buildup, inconsistent cooling | DIY |
| High humidity or poor airflow | Condensation on exterior surfaces | DIY |
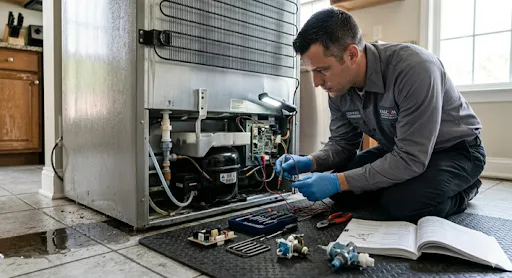
When to Call a Professional Appliance Repair Technician
Some issues are genuinely DIY-friendly. Others are not. If you have worked through all seven causes above and the leak persists, or if you suspect a problem with the defrost heater, defrost thermostat, or water inlet valve, it is time to bring in a certified technician. A leaky refrigerator is more than a nuisance to clean up. It can damage your floors or cause an electrical shock if the water contacts electricity.
Repairs involving electrical components like the defrost timer, evaporator fan motor, or control board should always be handled by someone with hands-on appliance repair experience. Attempting these without proper training can void your warranty and create safety hazards.
The team at Falcon Appliance Services handles refrigerator diagnostics, defrost drain cleaning, water line replacement, ice maker repair, and full appliance inspections across the service area. If your refrigerator is leaving puddles on your kitchen floor and the DIY fixes have not resolved the issue, a professional assessment will pinpoint the problem fast and get your appliance running properly again.
How to Prevent Water Pooling Under Your Refrigerator
Prevention is always better than a repair bill. Here are a few habits that keep refrigerator leaks from happening in the first place:
Flush the defrost drain with a baking soda and warm water solution once or twice a year. Check door gaskets every few months for signs of wear. Pull the refrigerator out seasonally to clean the rear coils and ensure proper airflow. Keep the refrigerator at recommended temperature settings year-round. Inspect the water supply line connection annually if your unit has an ice maker or dispenser. Avoid overpacking the refrigerator, which can block internal air vents and lead to uneven temperatures and excess condensation.
Final Thought
Water pooling under your refrigerator is almost always a sign that something in the drainage, sealing, or water supply system needs attention. The good news is that seven out of ten times, the fix is something a homeowner can handle in under an hour with basic household tools. When the problem goes deeper, working with a qualified appliance repair professional saves you time, money, and the headache of guessing.
If you are in the service area and need a hand diagnosing or fixing a refrigerator leak, reach out to the team at Falcon Appliance Services today.